What is Minicom?
To communicate with your Pi over the USB-serial, you wil need to run a terminal communication program on your laptop. There are a number of programs that support communication with a tty device (screen, tio, cutecom, putty, etc.) The lowest common denominator would be a program like screen. screen has the advantage of being nearly universally available without having to install anything extra, but it has only the most basic functionality. We think it's worth the effort to choose something a bit fancier. If you don't have a favorite terminal program that you are already comfortable with, we recommend minicom as a simple option with nice features.
Install minicom
Use your platform package manager to install minicom
- On macOS:
$ brew install minicom - On WSL/Ubuntu:
$ sudo apt install minicom
Read the man page!
Almost all unix commands come with a built-in user manual that you can access ussing man <command>. Try this now for minicom to be introduced to its features:
$ man minicom
MINICOM(1)                               Version 2.7                               MINICOM(1)

NAME
       minicom - friendly serial communication program

SYNOPSIS
       minicom [options] [configuration]

DESCRIPTION
       minicom is a communication program which somewhat resembles the shareware program
       TELIX but is free with source code and runs under most Unices.  Features include
       ...
Configuring minicom
You can invoke minicom with flags that indicate the settings to use, such as which serial device to connect to, baud rate and protocol, and so on:
$ minicom -D /dev/YOUR_DEVICE_PATH -w -c on -b 115200
The above command connects to a particular device path and sets -w for line wrapping
-c on to turn on terminal colors, and -b 115200 sets the baud rate to 115200 baud.
You can use the find-dev.sh script to get the device path for your CP2102 device.
Rather that have to type all these flags each time, you can configure these as the default minicom settings. To access the minicom settings, enter this command
$ minicom -s
You are now able to configure the minicom settings. The top-level configuration menu looks like this:
+-----[configuration]------+
| Filenames and paths      |
| File transfer protocols  |
| Serial port setup        |
| Modem and dialing        |
| Screen and keyboard      |
| Save setup as dfl        |
| Save setup as..          |
| Exit                     |
| Exit from Minicom        |
+--------------------------+
Use up/down arrow keys to select a menu item and hit enter to activate it. Select the Serial port setup to access its settings submenu, which looks like this:
+-----------------------------------------------------------------------+
| A -    Serial Device      : /dev/cu.usbserial-0001                    |
| B - Lockfile Location     : /usr/local/Cellar/minicom/2.8/var         |
| C -   Callin Program      :                                           |
| D -  Callout Program      :                                           |
| E -    Bps/Par/Bits       : 115200 8N1                                |
| F - Hardware Flow Control : Yes                                       |
| G - Software Flow Control : No                                        |
| H -     RS485 Enable      : No                                        |
| I -   RS485 Rts On Send   : No                                        |
| J -  RS485 Rts After Send : No                                        |
| K -  RS485 Rx During Tx   : No                                        |
| L -  RS485 Terminate Bus  : No                                        |
| M - RS485 Delay Rts Before: 0                                         |
| N - RS485 Delay Rts After : 0                                         |
|                                                                       |
|    Change which setting?                                              |
+-----------------------------------------------------------------------+
Select a setting to edit by typing its letter (i.e. A to change serial device, E to change baud rate, etc.) After making your changes, hit enter to return to the top-level menu.
In the Screen and keyboard settings, you can change the background and foreground colors. I like to set distinctive colors that remind me this is my minicom window. Feel free to poke around in the other settings and see what works for you.
After making the changes you want, select Save setup as dfl in the top-level menu. This will save the current settings as your default configuration. Exit from mincom. In the future, simply invoke minicom and it will configure to your chosen defaults, no flags needed!
Another recommendation is create a separate window/tab to run minicom and always keep it running. No need to exit and restart minicom. When you disconnect or cut power to your Pi, minicom will temporarily pause (it shows a message about "lost connection"). When your Pi resets, minicom will automatically reconnect and resume communication.
Loopback test
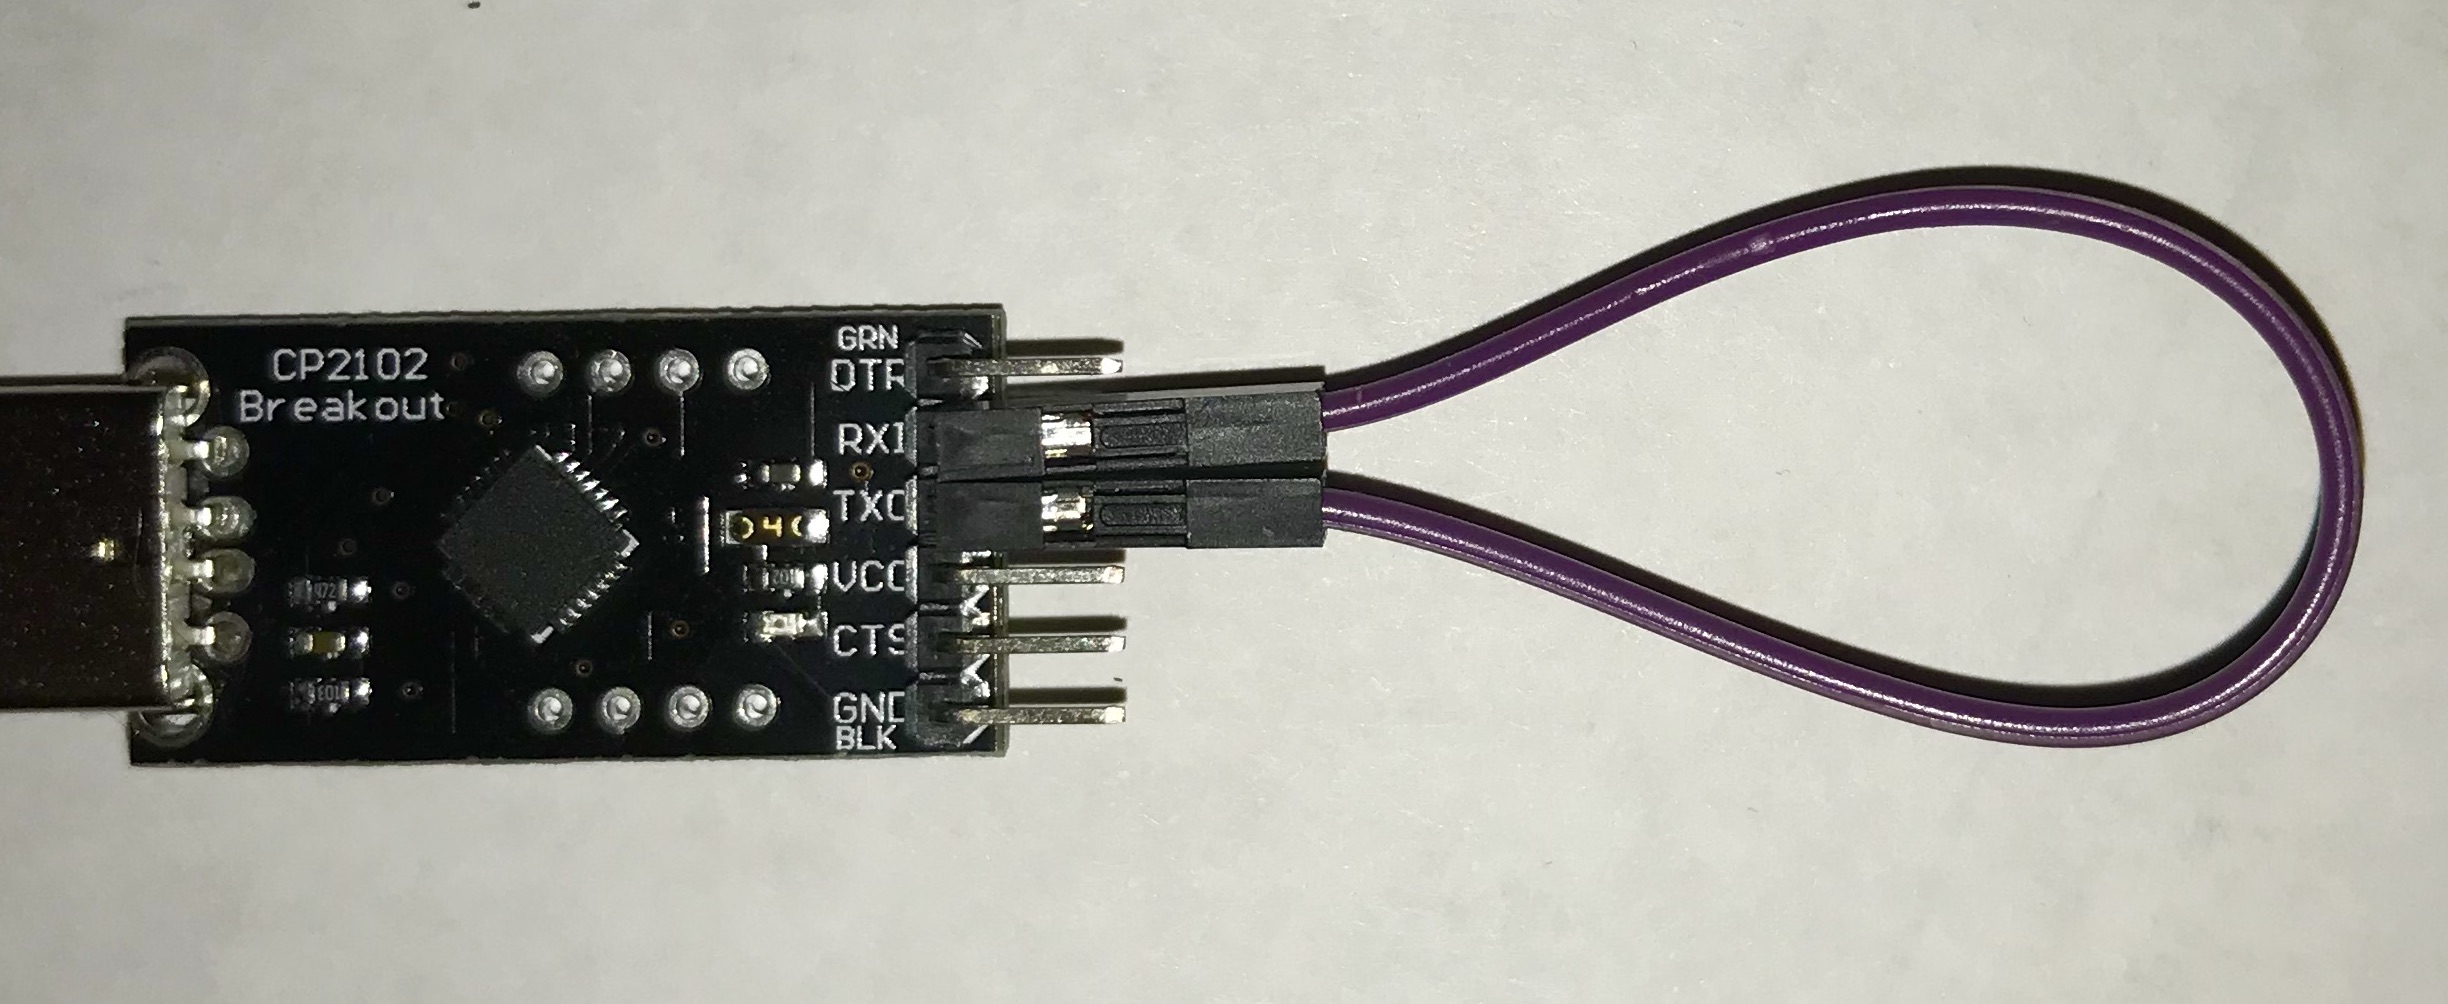
Grab your USB-serial adapter and a female-female jumper to test out minicom now. Directly connect TX to RX on the USB-serial adapter in loop back mode, as shown in this photo:
Now start minicom and type characters in the minicom window to see that they are echoed back.
$ minicom -D /dev/YOUR_DEVICE_PATH -b 115200
In loop back mode, the signals sent out on the TX pin are wired straight to the RX pin. Reading from the RX pin will read the characters sent over TX.
When you connect the TX and RX to the Mango Pi, minicom is bridging the communication from your laptop to the Pi and back. Minicom sends what you type to the Pi and displays what is received from the Pi. Neat!